Category Archives: Recipes

Zucchini Coconut Oil Bread: Or How to Re-focus Destructo Girl

By | Honest Mothering, Recipes | 4 Comments

Baking isn’t something I do much of in the summer. In fact, as I mentioned to my friend Dani today, all I want to do lately is drink my meals. Before you start judging (or laughing)… While I’m tempted to imbibe large amounts of consciousness altering beverages during these sleep deprived, crazy preschooler-centric days, I’m actually drinking smoothies. Mainly veggie heavy smoothies. Yesterday, two of my three meals were smoothies. It was heavenly.

Of course, after that many smoothies, we all wanted a little something to “stick” to our ribs. Plus, we needed a distraction from the stir craziness that heat advisory house arrest creates for a mom with a younger kids.

Yesterday and today, exhaustion, the frustration of monotonous tasks and the feeling that I never get anything done anymore finally got to me and I felt myself rapidly approaching insanity. First, I gave in to my inner bi-atch and, I’m ashamed to say, was a total grump with my poor kids. Then, I freaked out and cried hysterically for a few minutes. I’m not joking. There. I said it in public!

Annoyed with myself for my lack of control, I took a deep breath and decided to change direction. When my sweet giant baby finally took a nap, I got out the mixing bowls and ingredients to make a sweet treat that would use up the zucchini overload in my fridge.

As I prepared the tools for baking, Destructo Girl came in and said, “Mommy, I would like to watch you cook.” I said, “You bet!”

We had so much fun! Doing something unusual like baking together in the middle of a hot, hot day really changed the whole attitude of our house.

I didn’t intend to create a recipe out of this. I wanted to learn a lesson about self discipline – the art of taking a breath and choosing a different path. The awesome recipe was just a happy accident.

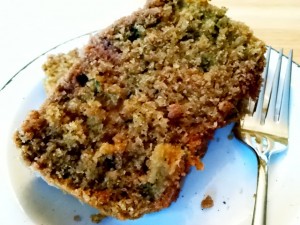
First, I should warn you that because I didn’t intend to post this, my baking time is an estimate. I’ll update the post the next time I bake this. Second, while this recipe uses nutrient dense ingredients that are good for all of us like Coconut oil, whole wheat pastry flour, zucchini, eggs and milk, I consider it cake though most would consider it a quick bread. Nursing mamas will love that it also includes ingredients that encourage more milk – brewer’s yeast and flaxseed meal. The final result is a moist, flavorful and satisfying treat!

p.s. Please, please, PLEASE don’t ruin this recipe by trying to substitute nasty canola oil for the coconut. Ugh. If you need to sub, try melted butter or avocado oil.


*If you don’t want to heat up your house, do what I do and bake this in a convection/toast oven on the back porch. YES!

Zucchini Coconut Oil Cake

Streusel topping

  • 1/2 whole wheat pastry flour
  • 3/4 c. brown sugar
  • 1/2 t. nutmeg
  • 2 t. ground cinnamon
  • 1/4 c butter

Cake dry ingredients

  • 2 1/2 c. whole wheat pastry flour
  • 1/2 c. flax meal (I just whiz some flaxseeds in my coffee grinder)
  • 3 T. Brewer’s yeast
  • 3/4 t. nutmeg
  • 1 t. fine sea salt
  • 1 t. baking soda
  • 1 t. baking powder

Wet ingredients

  • 1 c. coconut oil
  • 2 c. brown sugar
  • 3 eggs
  • 2 t. vanilla extract
  • 2 cups grated zucchini (not drained)
  • 1/2 c. milk

1. Preheat oven to 325 F.

2. Grease and flour two loaf pans. (I used 1- 8.5×4.5×2.5″ and 1-5.25x9x2.75″ because I don’t have matching ones! This, along with my being distracted by three kids, is partly why my baking time is fudged.)

3. In a medium bowl, measure the dry streusel ingredients and mix in the butter with a fork or fingers till it resembles small crumbs. Destructo Girl used her fingers on this step and was integral to its deliciousness.

4. In a separate bowl, combine the dry ingredients and stir together thoroughly. 

5. Finally, in a larger bowl, mix the coconut oil and sugar together till well combined. (I used a hand mixer.)

6. Add the eggs one at a time till just mixed.

7. Add vanilla, zucchini and milk.

8. Finally, dump the dry ingredients into the wet and stir until just combined.

9. Divide batter between the two loaf pans, being sure not to fill more than 1/2 to the top.  (Believe me, I did this over the weekend for my oldest’s b-day cake and it was an epic mess!) This batter is pretty wet looking.

10. TOP with streusel.

11. Pop in the oven and bake somewhere between 45 min and an hour. Ok, I realize this part might freak some of you out – so here’s how to tell if it’s baked all the way. Bake it at least 1/2 hour before opening the oven because you don’t want your cake to drop. I waited about 45 before checking.

You can tell a cake is done using two tests. First, if you press gently into the middle, the dough will spring back instead of staying indented. Second, if it springs back and a toothpick inserted deep into the middle comes out clean (or with just crumbs on it – not wet!), you’re golden. If your cake is already pulling away from the sides of the pan, chances are it’s overdone.

Hope you enjoy this! Let me know if you bake it.

If you liked this post, share it!

Don’t miss out on the conversation. SUBSCRIBE to OM Cafe. It’s free. 

YTo3OntzOjk6IndpZGdldF9pZCI7czoyMDoid3lzaWphLW5sLTEzNTAyMjcwMTAiO3M6NToibGlzdHMiO2E6MTp7aTowO3M6MToiMSI7fXM6MTA6Imxpc3RzX25hbWUiO2E6MTp7aToxO3M6MTM6Ik15IGZpcnN0IGxpc3QiO31zOjEyOiJhdXRvcmVnaXN0ZXIiO3M6MTc6Im5vdF9hdXRvX3JlZ2lzdGVyIjtzOjEyOiJsYWJlbHN3aXRoaW4iO3M6MTM6ImxhYmVsc193aXRoaW4iO3M6Njoic3VibWl0IjtzOjEwOiJTdWJzY3JpYmUhIjtzOjc6InN1Y2Nlc3MiO3M6NTA6IkNoZWNrIHlvdXIgaW5ib3ggbm93IHRvIGNvbmZpcm0geW91ciBzdWJzY3JpcHRpb24uIjt9


Cradle Cap: Naturally Prevent or Eliminate It

By | Natural Health, Parenting, Recipes | 39 Comments

Cradle Cap is one of those things that can sneak up on us mamas, especially when we’re newbies. We’re so busy figuring out the whole nursing, sleep deprivation, diaper changing and how-to-decipher-baby’s-cry that we might not even notice till there’s a strange little crust on baby’s sweet head. Gross, right? Well, it’s not surprising they get it considering how many hands are touching and rubbing them and how many lips are kissing them constantly. Fortunately, cradle cap can be resolved naturally and easily if you know what to do.

First a little info. According to one of my favorite baby doctor authors, Dr. William Sears, cradle cap is seborrheic dermatitis. It can result from oil buildup, hormones and even fungal activity. Not what you want on your little baby, right? He suggests using a dandruff shampoo to deal with it. But if you’re like me, you might not want to use something so harsh on your little treasure. We have a much gentler, less toxic way of handling it at my house!

Ready??? Here it is.

Coconut oil. Yep. This stuff is magic.

While it’s true that you can use other oils like olive oil to follow this process, coconut oil is special. First, it’s a fairly dry oil, meaning it won’t leave a greasy residue behind when you put it on your little one. Don’t want to mess up all those darling clothes you’re dressing him or her in, right? Second, coconut has anti-fungal properties. So if your little sweetheart’s cradle cap has progressed into a little fungal problem, it will help resolve the issue more quickly.

Here’s what we use:

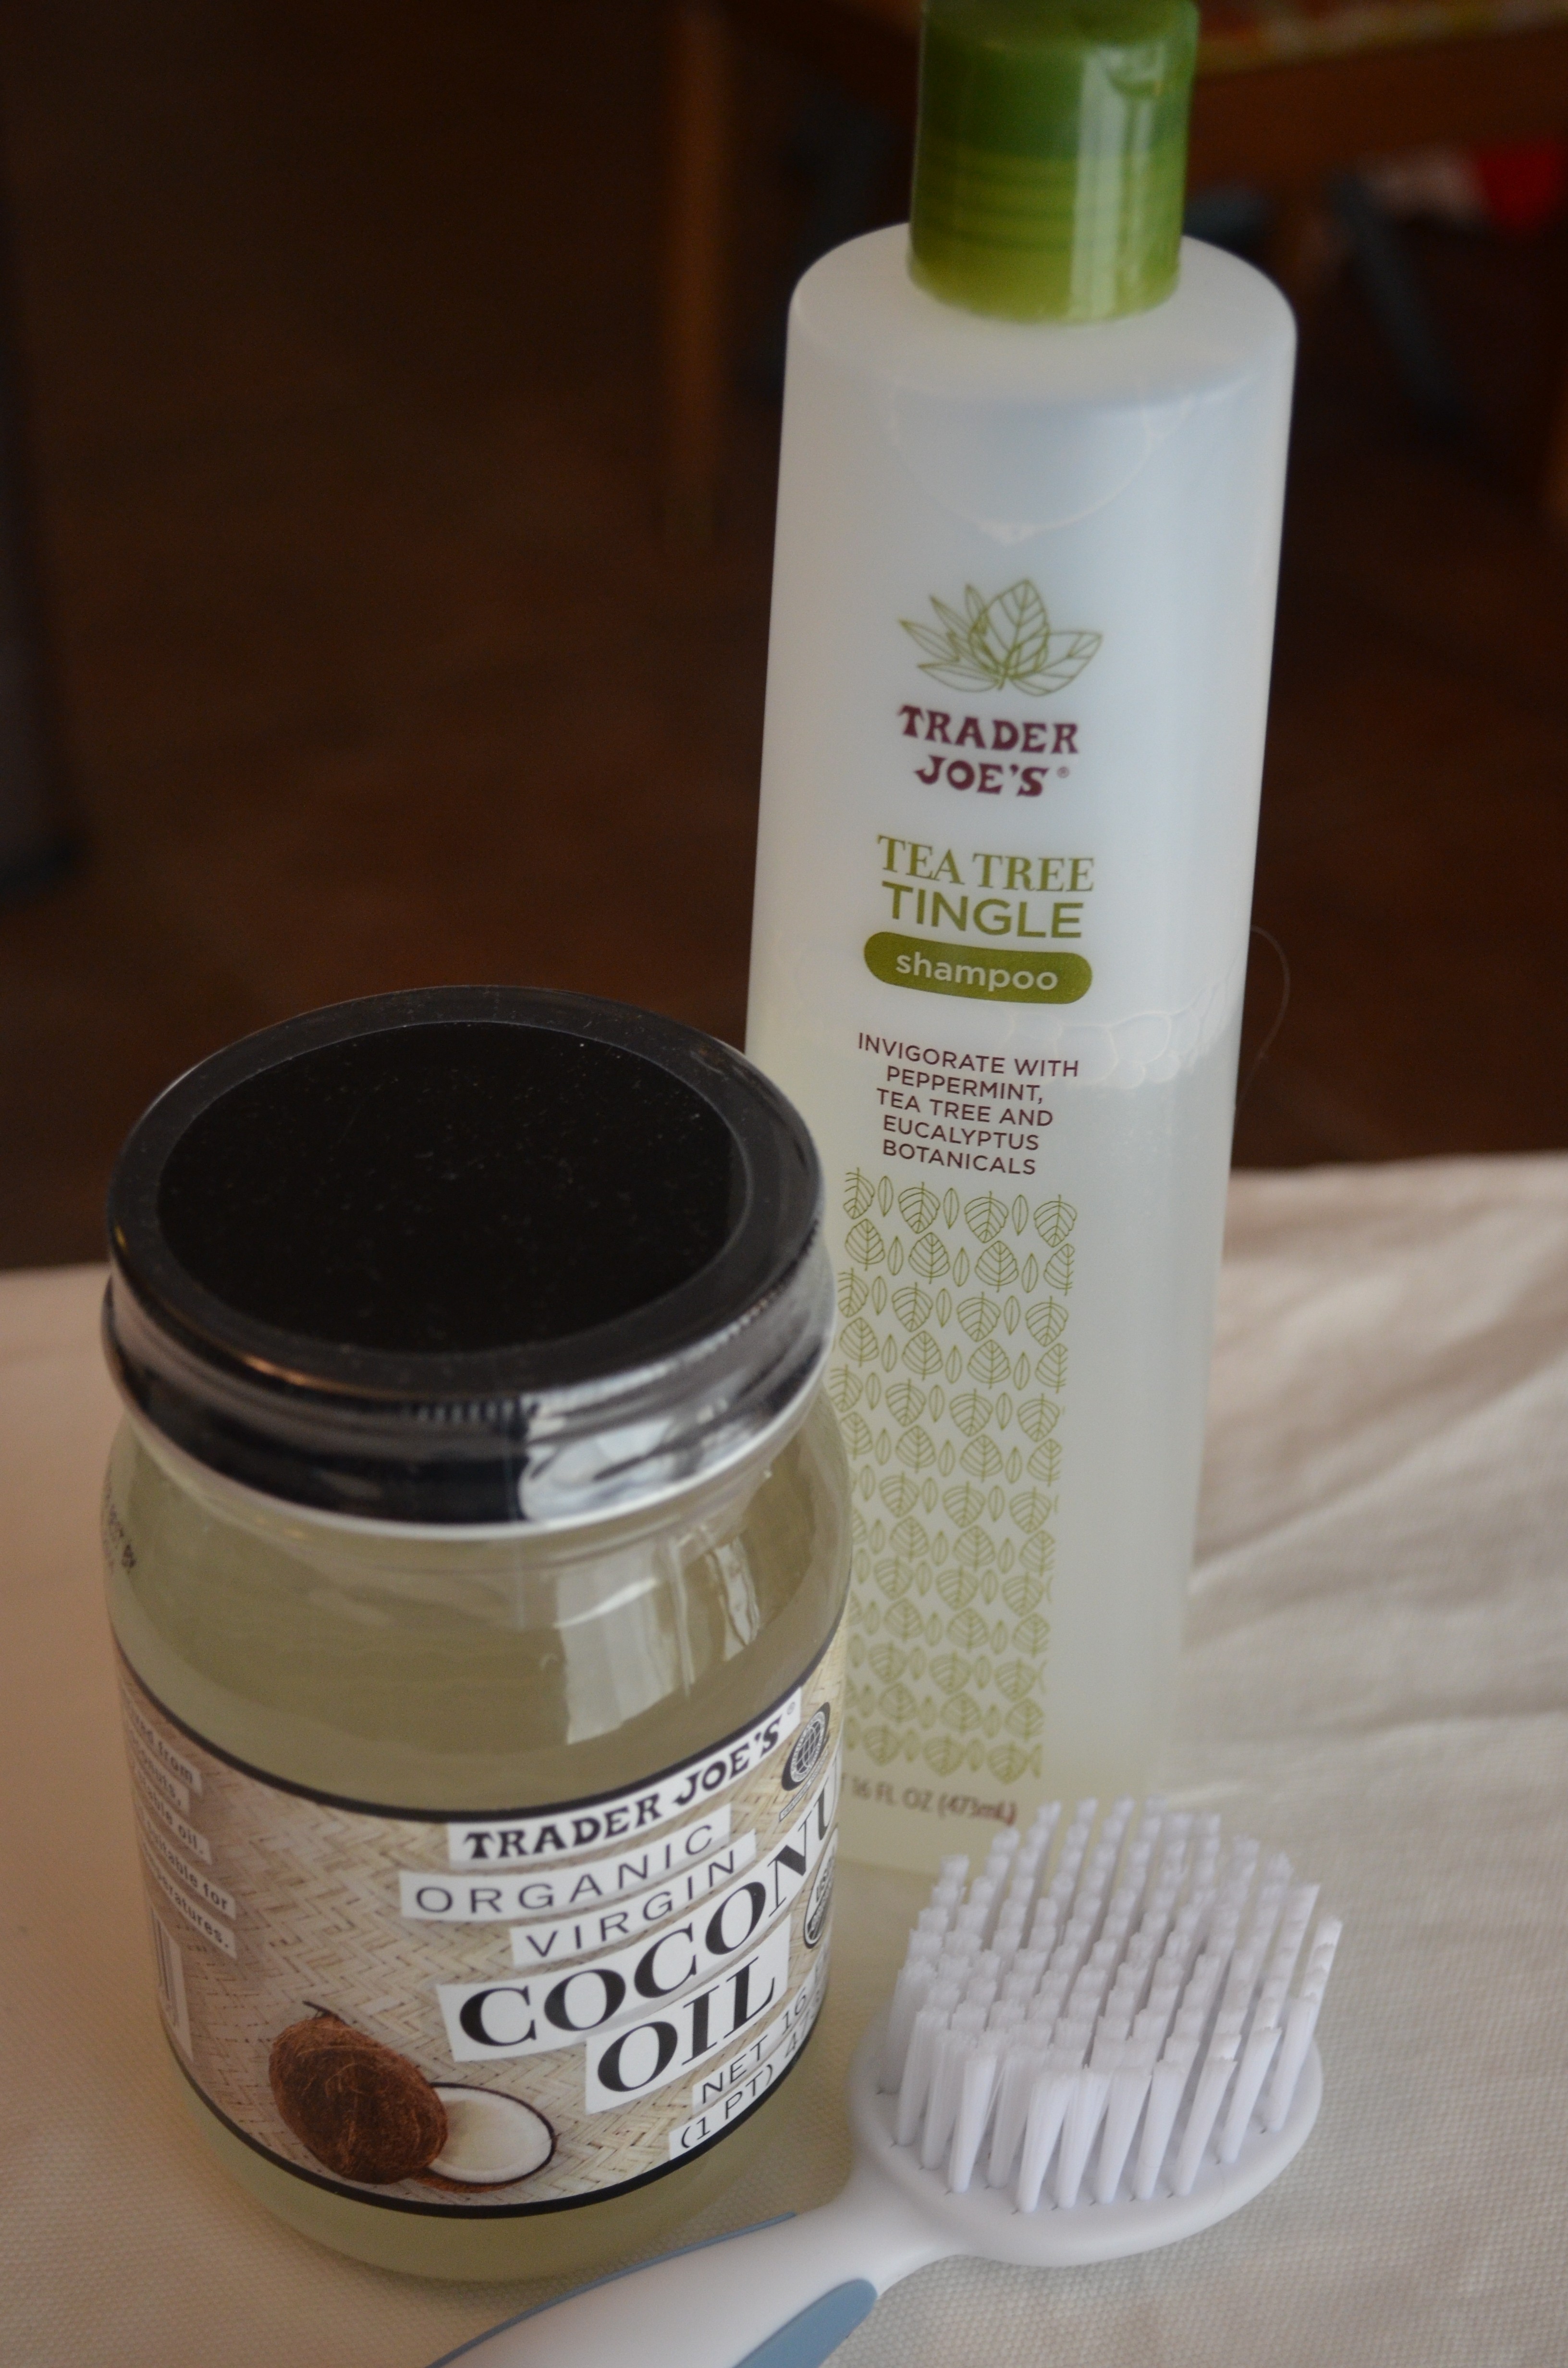
  • Coconut oil – Trader Joe’s organic oil is cheap and lasts a long time!
  • Mild shampoo – We use TJ’s Tea Tree oil shampoo for our whole fam. Tea tree oil is also anti-fungal and smells fresh!
  • Baby comb
  • Baby brush

*This really isn’t a commercial for Trader Joe’s. But, we like these products because while they’re not perfect, they’re fairly healthy for a reasonable price and mild enough for a baby. We don’t like to use harsh chemicals (sodium laurel sulfate, parabens and DEA’s etc) like those you’ll find in most “gentle” baby shampoos.

Here’s what we do:

***I choose a time when my baby is relaxed and happy – like right after a feeding. I connect with my little person during this process, looking straight into his eyes and smiling. Then I use a gentle, quiet voice to tell him what I’m doing. It is a calming and enjoyable time for us both.***

1. I pour a little coconut oil in my hand and gently apply to the baby’s head, massaging into skin without dripping it all over him. The idea is to connect with him so he can relax. If cradle cap has spread down onto the face, I apply the oil there as well, being careful to avoid the eyes. I pay special attention to eyebrows, behind ears and around the nose.

2. After I let the oil soak in for a few minutes I use a soft baby brush to gently massage my baby’s scalp, loosening the cradle cap as much as I can without distressing the baby. If it were severe, I would use a comb instead to gently scrape the crust off the baby’s head.

3. Next, I hop into the shower with my little person to remove the dead skin and oil. I gently apply shampoo onto the head and massage again with the baby brush. Not only is this relaxing for my baby but it will remove more of the cradle cap if I didn’t get it all the first time.

4. I carefully rinse my baby’s head, using a washcloth to wash his eyebrows, around his nose and ears and to keep soap from getting in his eyes.

5. After my baby is happily bundled and diapered (don’t want to have to shower again!), I give him a big smile and ask if he’d like a little massage. Then I apply a bit more coconut oil on that little head and rub it in gently. I actually use it all over my baby and he chuckles and smiles the whole time.

If a baby has severe cradle cap, it may take a  few passes to get all the crunchy stuff off his or her head. If it’s severe, no need to traumatize a baby to get it all off at once. Some consistent work – a few days in a row should get it all. Once it’s off, continuing to bath a baby regularly and apply the coconut oil works great to prevent cradle cap from re-occuring.

I used this method with my earlier babies and had great success. However, it’s possible to avoid cradle cap completely (as I did with my last!) by using coconut oil and bathing baby regularly to prevent it from building up in the first place. Coconut oil has been the perfect massage and moisturizing oil for our babies.

Just one more way to naturally prevent or treat a normal baby issue from the Organic Mama Cafe.

Did you like this post? Take a moment to share it with a friend on Pinterest or Facebook.
Better yet, if you haven’t yet signed up for my email list, do it now so you don’t miss a post.

[wysija_form id=”1″]

Looking for a boost in milk production? Try my awesome Flourless Lactation Cookies! They’re great even if you’re not nursing.

Linked up to Frugally Sustainable today!

Green Monster Smoothies (or how to get your children to DRINK their veggies)

By | Natural Health, Recipes | No Comments

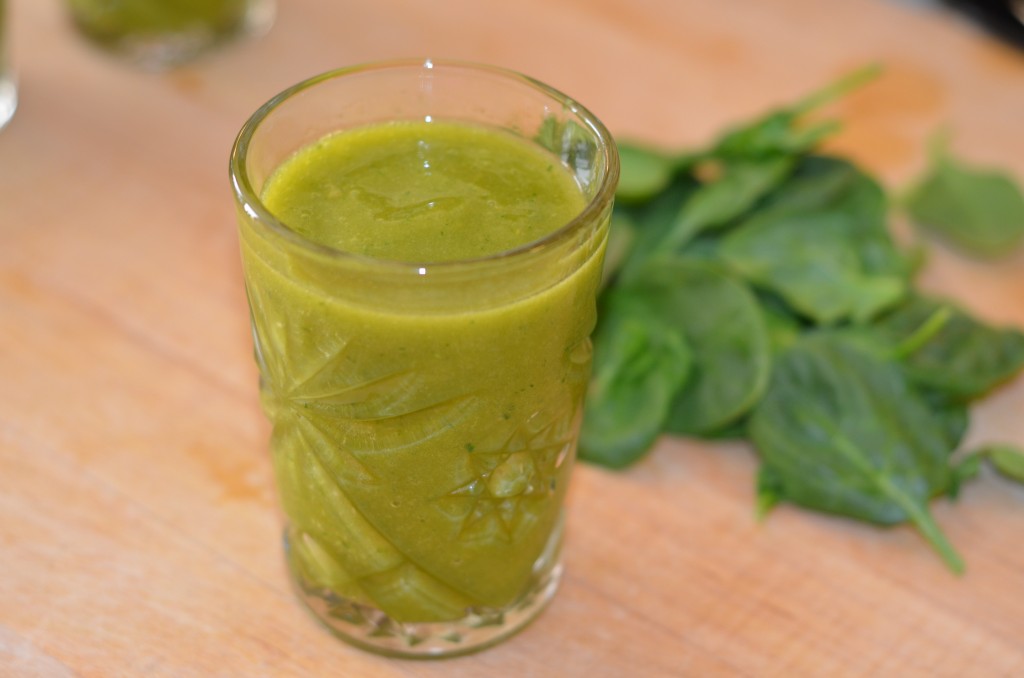
This morning when I woke, I knew I needed to eat but I just didn’t feel like breakfast. So, I decided to make something that would include a lot of nutrients – in drinkable form. Green smoothies won the day. Here’s my recipe. It is sweet but un-sugared, dairy-free, full of flavor and your kids will like it. Especially if you name something silly like we do. Our smoothie name is an homage to a favorite movie featuring a fuzzy blue Monster and his one eyed green sidekick. Maybe your kids have a similar hero. Be creative and get them to drink their fruits and veggies for the day!

By the way, this is a family sized smoothie.

Super Delicious Green Smoothie

2 Bananas (these are so sweet, you won’t need sweetener!)

1 small apple

Green Grapes (one handful)

1/4 c. frozen pineapple (fresh is fine)

3/4 c. frozen mango

3/4 c. fresh spinach

1/2 stalk celery – chopped into small pieces (you don’t want those strands wrapping around your blender blade!)

1 small English cucumber – these don’t have many seeds and I don’t peel it

1/2 c. water

1/4 c ice

I just add enough water to get my blender moving. If you have a newer Vitamix or blender that doesn’t need as much, feel free to omit it. 

If you have extra, pour it into a glass and put in the fridge till later. 

OR, pour it into popsicles molds and freeze.

Enjoy!!


Organic Mama’s Magic Chicken Soup

By | Natural Health, Recipes | No Comments

1 whole organic uncooked chicken, remove gizzards & throw into the freezer till later (unless you like them in your soup)

1 medium onion, finely chopped
4 stocks of celery, finely chopped
4 carrots, finely chopped
4-7 cloves FRESH crushed garlic (immune boosting)
2 T. Olive oil
Sage (has drying properties)**See note!!**
Sea Salt to taste (several Tablespoons)One Large stew potOptional items – to be added once broth is strained:
1-2 cups cooked rice*. Cooked so you don’t lose all the liquid in your soup. *Great for those suffering from tummy distress.
Any veggies you love to eat with chicken. Cut them into bite sized pieces so they’re appealing to kids.
Egg noodlesInstructions:

1. Heat stew pot from med to med-high and add 2 T olive oil. It should easily swirl in pan

2. Add veggies (except garlic) and a couple pinches of salt to taste

3. When veggies are translucent, throw in garlic and cook for a minute more. Don’t burn it because burnt garlic tastes just dreadful!!!

4. Place whole chicken (be sure to take out the guts first!) in pan and add water to cover the chicken by several inches

5. Add a small handful of sage

6. Bring chicken to a boil and simmer till cooked (depending on size between 1 1/2 to 2 hours)

7. Salt and pepper to taste

8. SERIOUSLY – SALT IT or it just won’t taste good!!

Another great way to make this is just to dump the ingredients in a crockpot and cook all day or overnight.Lazy girl (or really sick mama) method: When chicken is cooked, use the broth straight out of the pan and serve but watch for chicken bones.
Motivated person method: Pour the liquid through a strainer into another pan or heat proof bowl. Place back in the pan and add egg noodles or rice and veggies as desired. When the chicken is cool enough, pull the meat off the bones and throw it back into the soup or use part of it throughout the week to make other chicken rich dishes.It’s perfectly ok to add a little extra water if you find you’ve overdone it on the rice or veggies.It’s important to use a whole chicken because the bones have nutrients that will strengthen and heal too!****Pregnant mamas who have a tendency toward miscarriage may want to avoid sage. The rest of this recipe should be fine for you!****